If you recall, last month, Google said that the Nexus 6 and LTE Nexus 9 will get Android 7.0 in a few weeks. Inline with that, the Nexus 6 started receiving the update earlier this week. The good news is that now the HTC-manufactured tablet has also officially started getting Nougat.
The update bumps the build number to NRD90R, and also includes Android security patch for the month of September - the security level, post update, shows a date of September 6. For comparison, the Nexus 6 Nougat update brought along a security patch dated October 5.
Its worth mentioning that Factory and OTA images arent yet available from Google.
Been living under a rock? If so, then you dont know that today Google has officially announced the Pixel and Pixel XL, its first own-brand smartphones. The duo is already up for pre-order in a few markets.
So now that this has happened, what about the companys long running Nexus line? In a way, the Pixels can be considered the successors to the LG Nexus 5X and Huawei Nexus 6P from last year, after all. So will there be any more Nexuses, perhaps that rumored Huawei built small tablet?
The answer is a resounding no, and it comes straight from Google. The company says it has "no plans" to out any more Nexus products, so RIP Nexus. To add insult to injury, the aforementioned Nexus 6P and Nexus 5X are gone from Googles online store - all traces of them have been removed. You can still order them from other retailers of course, but its unclear how long that option will remain open. Its also a my stery if they will ever get the full Pixel software suite, including the new Google Assistant functions. For now anyway, if you want any of that youre going to have to shell out a pretty large amount of dough and purchase a Pixel or Pixel XL.
Samsung Galaxy S8 is finally here! This flagship phone set fire to the market when it came out. We had a great time. We can not wait to be able to touch it and caress its superb inclinations to double curve. This is one of the most anticipated smartphones in 2017 and for good reasons.
Samsung Galaxy S8 has a screen almost without scope, thus providing more viewing surface.
There are two variants of the phone: the Galaxy S8 and the S8 Plus. You can choose either of these two depending on the screen size you prefer.
Samsung has decided to remove the home button, providing a seamless experience.
The speed has been considerably increased.
For all those who need more storage, Galaxy S8 comes with a 256GB model as well.
The flagship phone of Samsung is available with an amazing dual camera at the rear.
What is even more exciting is that this phone is equipped with a fingerpr int sensor at the back, it introduces us a new voice assistant called "Bixby" that works with Apple Siri to help you. How great is that?
In addition to the features listed above, Samsung has also repaired all the battery-related problems that caused an outcry last year among consumers of the S7 Galaxy. Now we will have the opportunity to bring our phones on the plane this time.
In case you plan to purchase one of these phones, you should know how to back up your data and restore your phone as needed.
Backup and Restore Samsung Galaxy S8 - Saving contacts, photos, music and more
We transport our world into our smartphones. We do not use a diary to write phone numbers. We keep it on our mobiles! We smartly click on our photos with our superb smart camera cameras and we do not feel the need to carry our DSLR or your numbers.
Then there is no need to talk about music! We have dropped mp3 players and are proud of o ur phones to provide soul food. Indeed, the items stored on our mobiles are very important and close and dear to us!
Backup Data and restore your Galaxy S8
Most of us are linked strings and souls to their smartphones. We use our phones to store important data such as music, photos, contacts, messages and even medical information. Our devices are so valuable to us that we feel essentially disabled when we do not hold them.
At a time when the world is becoming digital and nobody is actually using CDs or physical copies to store such information, it becomes necessary to know how to recover your files in the event of an unfortunate incident where you lose your data.
Your phone may be stolen, or you may lose it, or if you buy a new device, it is better to back up your Samsung Galaxy S8 once in a while.
Meet Wondershare TunesGo: Your Savior in such Situations
Wondershare TunesGo is a software absolutely es sential for all those who will help you to backup your Galaxy S8. It is user-friendly and allows you to perform various tasks such as: backing up or restoring media, transferring music, photos, contacts, between your phone and your computer, downloading or discovering new music, organizing your playlists , Record audio and even create gifs using photos or videos.
You can do everything on a single platform, is not it great? In addition, unlike iTunes, Wondershare TunesGo is compatible with Android and iOS devices.
How to Backup and Restore Samsung Galaxy S8
You can save contacts, messages, music, photos and more files on Samsung Galaxy S8 to PC easily.
Step 1. Start the program and make sure your Samsung Galaxy S8 is connected to the computer. The software will detect your Galaxy S8 and it will appear on the main interface.
Step 2. Click the "Toolbox" tab at the top right. It will open a new window. You will find the "Backup & Restore" directly in the transfer tools. Select "Backup Device".
Step 3. It will display all the contents of your Galaxy S8. Select the ones you want to save a copy of, and also choose the destination for the file. You can also check the total file size at the bottom of the window, as this will help you manage your storage. Click "Backup". And youre done!
How to restore your Galaxy S8 device from Backup
Step 1. Open the TunesGo software and connect your Samsung Galaxy S8 to the computer.
Step 2. Go to the "Toolbox" tab and select "Restore Device" under the Save & Restore option. It will display all backup files.
Step 3. Select the backup file you want and press "Next."
Step 4. It will open a window showing the contents of that particular backup file. Select the ones you want to restore and click the "Restore" button.
Step 5. Once you have restored your device, it will prompt you to "restore completely" on your screen. Remember that before you restore your data, you will be prompted to allow the TunesGo connector to open or copy any content you have chosen on your Galaxy S8.
Wondershare TunesGo is not only an alternative to iTunes, but also allows you to do many other things that iTunes does not allow. The software offers a free trial but must be purchased after the free trial period ended. They have different versions for Mac OS and Windows OS. You can choose any of the three plans available to suit your needs.
It is very simple, saf e and quick to use. In addition, it serves as a common interface between Windows, iOS and Android platforms. Something that many software applications can not boast!
We strongly recommend that you get it. Once you start using it, just like your Galaxy S8, you will not be able to live without this software!
A new LG tablet has leaked. Dubbed GPad X2 8.0 Plus, the device has showed up on T-Mobiles website. The handset is powered by an SoC with octa-core 1.4GHz processor, and sports an 8-inch display of 1920 x 1200 pixel resolution.
RAM is 2GB, while storage is 32GB (theres a microSD slot as well). The device features a 5MP main camera as well as 5MP front shooter. It runs Android 7.0 Nougat out of the box.
The leak also reveals an accessory for the tablet. Its basically a dock with a kickstand that can be attached to the tablet in the following way:
The accessory is said to be called the G Pad Plus Pack and may also include a 4,400mAh battery. Theres currently no information on the tablets pricing and availability, although given that it has appeared on T-Mobiles website, launch seems imminent.
Dimensions: 2.76" h x .59" w x 5.41" l, .99 pounds
Features
UNLOCKED - NO CONTRACT REQUIRED. this factory unlocked 4G (HSPA+) 4.3" LCD IPS smartphone is guaranteed to work on every GSM carrier across the US including: AT&T, T-Mobile, Tracfone, etc. *not compatible: CDMA networks like Verizon/Sprint
GLOBAL COMPATIBILITY/DUAL SIM: Vacationing? Studying abroad? verykool has you covered. This GSM phone works in 126+ countries across the globe, including: Central/South America, Africa, Europe, Asia, the Caribbean, & more (see GSM bands below)
BETTER CAMERAS, MORE STORAGE. Capture and share your favorite moments with an 13MP rear camera and a 2MP front-facing camera (LED flash). Play games? Store a lot of music/photos? 16GB of internal storage & an external 32GB MicroSD slot has you covered
POWERED BY MEDIATEK. Dual-Core Processor. This Quad-core ultra-fast MediaTek MT6589T processor is powered by two 1.5GHz Cortex-A7 ARM cores.
WATCH THE VIDEO: shatter resistant, water proof, shock proof. We are a publicly traded company based in San Diego, CA (nasdaq: IFON) & offer a 1-Year warranty
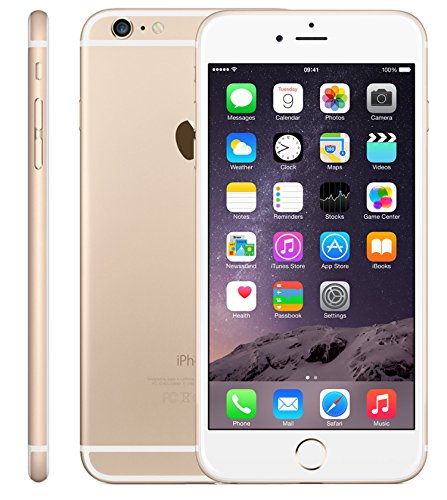
Apple iPhone 6 Plus 16GB Factory Unlocked GSM 4G LTE Smartphone, Gold (Certified Refurbished)
Apple iPhone 6 Plus Features
This Certified Refurbished product has been tested and certified to work and look like new, with minimal to no signs of wear, by a specialized third-party seller approved by Amazon. The product is backed by a minimum 90-day warranty, and may arrive in a generic brown or white box. Accessories may be generic and not directly from the manufacturer.
Factory unlocked iPhones are GSM models and are ONLY compatible with GSM carriers like AT&T and T-Mobile as well as other GSM networks around the world. They WILL NOT WORK with CDMA carriers like Sprint, Verizon and the likes. The phone requires a nano SIM card (not included in the package).
...
Appl e iPhone 6 Plus Description
Whats in the box: Certified Refurbished iPhone 6 Plus Gold 16GB Unlocked , USB Cable/Adapter. Comes in a Generic Box with a 1 Year Limited Warranty.
... Thanks for reading Apple iPhone 6 Plus Review.
Root Lenovo A7000. Todays guidebelajar will share to you about how to perform root on android smartphone device. Now I will explain how to root on Lenovo A7000. this device comes with Android OS, v5.0 (Lollipop) and suppoerted with Chipset Mediatek MT6752m, Processors Octa-core 1.5 GHz Cortex-A53, GPU Mali-T760MP2, 2 GB of RAM as their engine. Before we continued our experiment I will explain to you what is the meaning of root on android, additional feature is main camera with 8 MP and secondary camera 5 MP will give you good experience to take any picture. By root your Lenovo A7000, you will allowing user to attain privileged control on this device. for example they can uninstall default applications in internal memory, or they can install Cutom ROM on Lenovo A7000. Beside some advantages, also there are some risk. For example, they will loose their warranty for this device.
Guide Flash Lenovo A7000 using SP Flash Tool.
Make sure to always take backup all your important data like music, video, SMS, document (see this guide) and other data to the other resource outside of Lenovo A7000 device, and make sure your battery is fully charged or at least there is 80% of power on it before you continoued to proceed.
Make sure your device is Lenovo A7000. because this guide is intended just for this device
Then you click options ->Download -> then check DA DL all with checksum.
Root Lenovo A7000
Next, close option box.
On download tab, ensure you have selected download only option from dropdown menu, see below picture.
Root Lenovo A7000
Then click on checkbox recovery and browse to the extracted files and locate recovery.img
Root Lenovo A7000
Then, Turn off your Lenovo A7000 android phone.
Pull you battery fr om Lenovo A7000
Then, click download button on top right and connect your Lenovo A7000 with USB cable in phone switch off position.
Root Lenovo A7000
Process will run automatic, and you can see the red stripe showing download percentage at bellow
When your process complete, you can see a green circle with tick mark.
Root Lenovo A7000
Now disconnect your Lenovo A7000
Intall you battery again.
Then, start your Lenovo A7000.
Root Lenovo Lenovo A7000.
To perform root on Lenovo Lenovo A7000, you must have CWM recovery installed on Android system. then you must download UPDATE-SuperSU-v2.46.zip (here).
https://userscloud.com/o8m7u398nmv5
When its done, now follow this guide to root your device.
First, copy the UPDATE-SuperSU-v2.46.zip file in your SD card root folder
Then, Enter/Reboot to recovery mode on your Lenovo A7000device. How to do this :
Switch off your phone
Then, Press and hold the Volume Down Button + Volume Up Button + Power Button.
When you see the Boot Screen, Release the Power Button only.
keep the Volume Buttons pressed until you see the Recovery Screen.
Then, Select the UPDATE-SuperSU-v2.46.zip file and click update to root Lenovo A7000.
Wait the process untill finish.
Now, You can confirm your device is rooted or not by downloading the Root Checker app from Google Playstore.